If you are considering a backyard waterfall, There are many steps of building to consider. The first question to consider is whether you want to build it yourself, or hire a contractor. While it is obvious that money can be saved with a DIY waterfalls, it may be difficult to find accurate comparison between a DIY waterfalls and a professionally installed one. What does it cost DIY vs hiring a professional? A DIY kit for a backyard waterfall can be purchased for much cheaper than a professional can be hired. Like many artistic enterprises, the value of a professionally created waterfall will be much more than a do-it-yourselfer's attempt at the same creation. If you choose to pursue a DIY waterfalls kit, here are a few things to consider before starting.
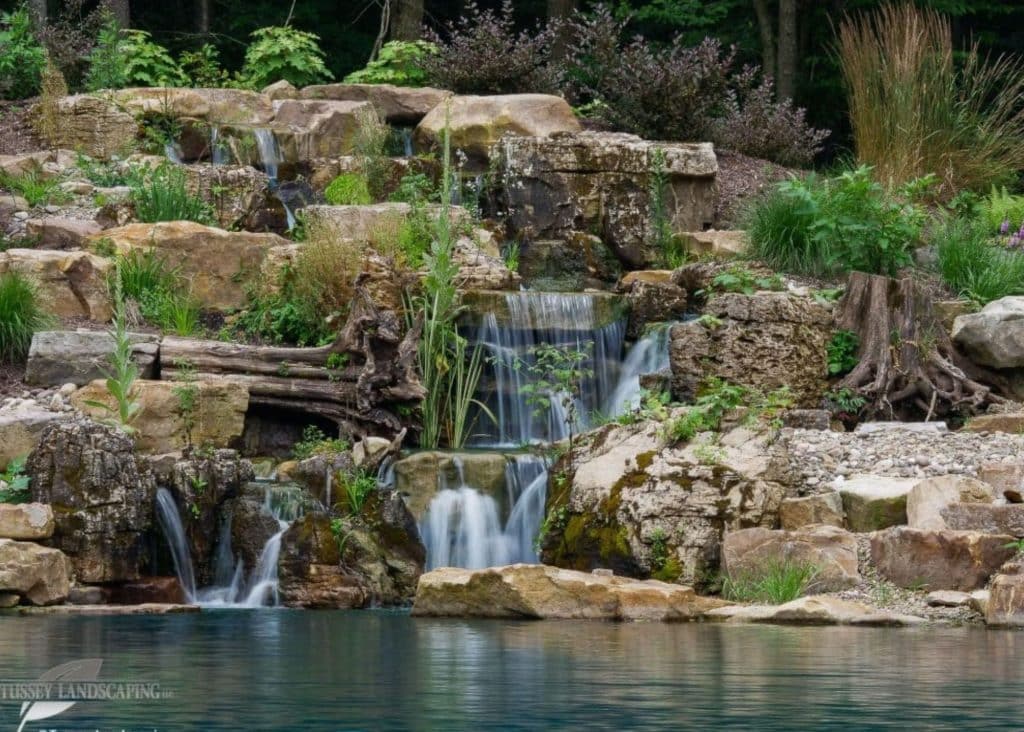
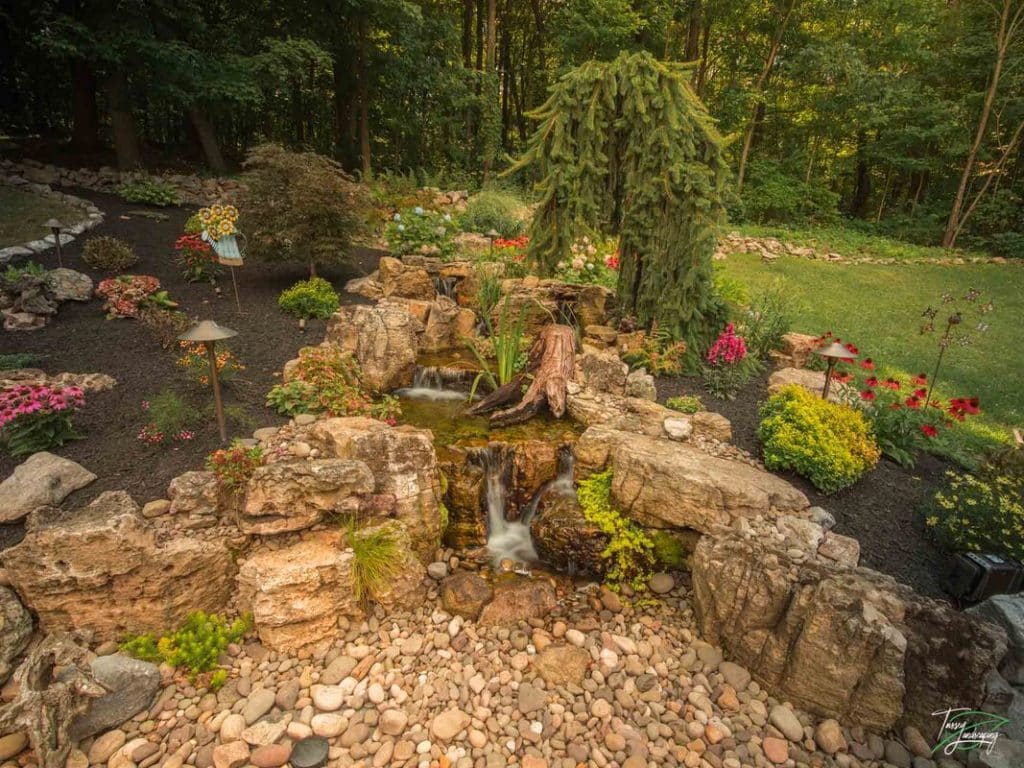
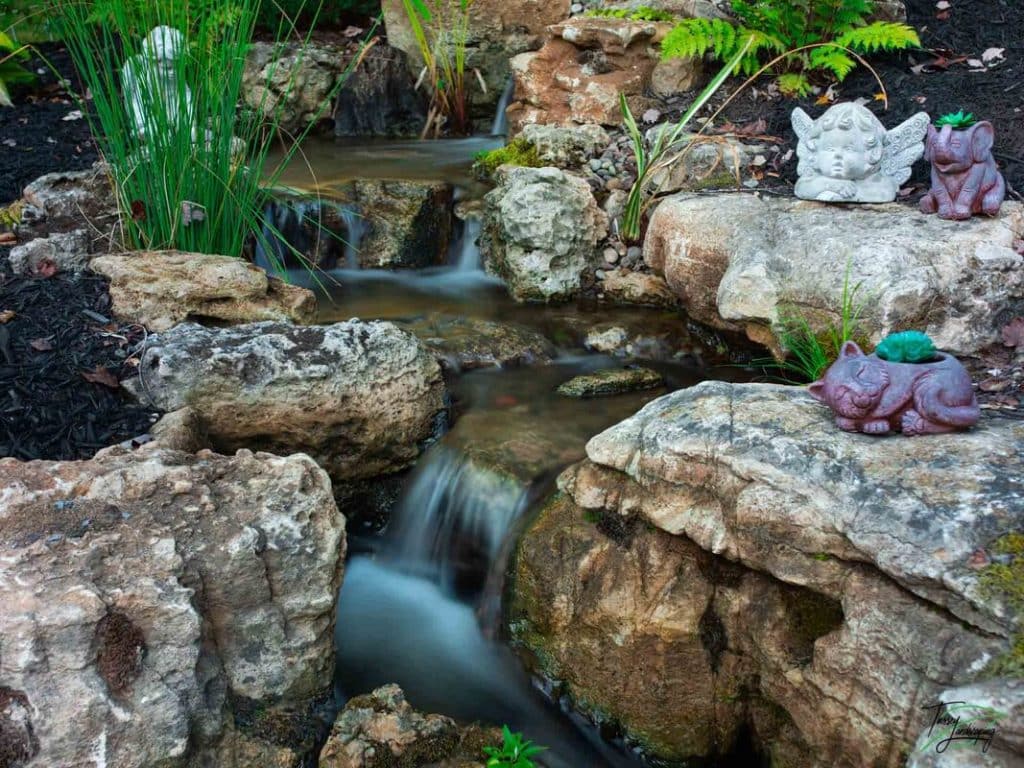
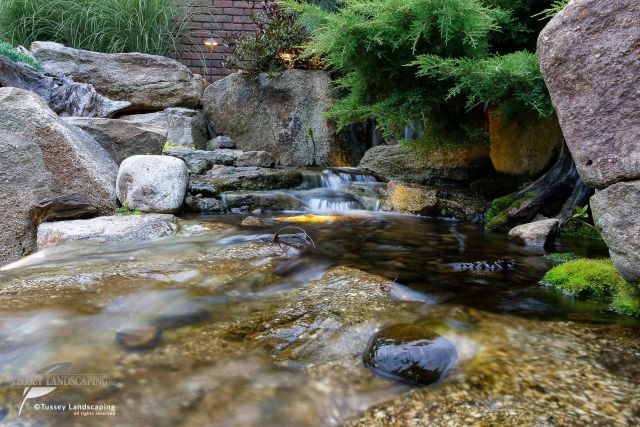
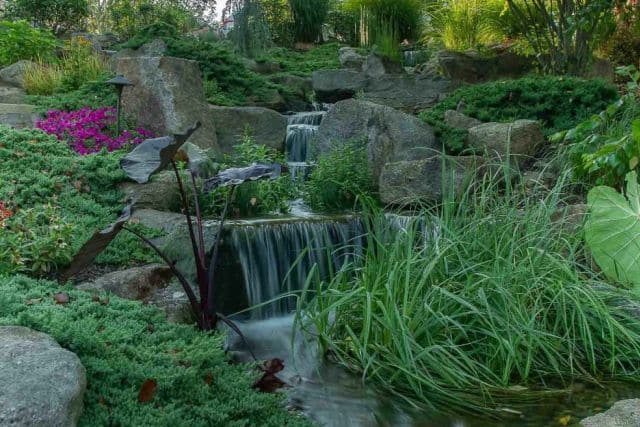
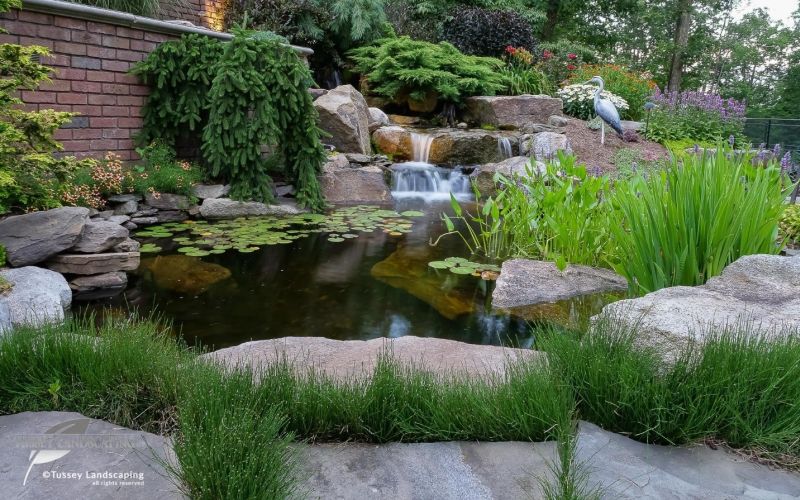
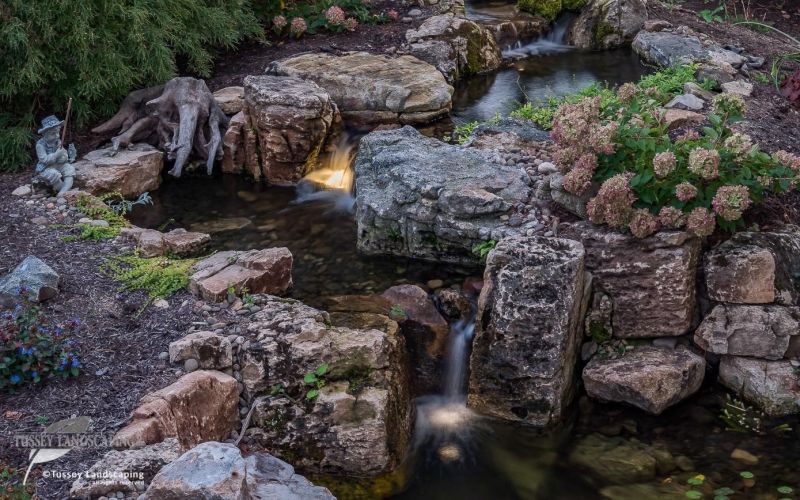
So, you want to begin construction of your backyard waterfall; Where do you begin? Actually, "where" is the first step to consider. You'll want to chose an area with natural slope to aide the flow of the waterfall. Many people chose an empty corner or low spot that needs "filled in with something." Orient your waterfalls to a place near your house where you can enjoy it through the four seasons. It is better if you can construct it near to the house, where the sound reaches indoors. Stand in your kitchen or bedroom and chose a spot that can be seen from inside. Excavation. Once the location and position of your waterfalls is decided, it's time to begin digging. The size and depth of your basin will be determined by your waterfall kit size. all the dirt from excavation can be used to increase the mound for the waterfalls. Different sizes of water features may have different basins. On smaller waterfalls, a preformed rigid plastic basin can be used. For Larger pondless waterfalls, Basins will be constructed using EPDM liner and Aquablocs. After the basin is completed, you can begin digging the stream and waterfall areas. Calculate how long your stream will be based on the liner size you have available. Don't forget to include the vertical distance to be measured for each waterfall. Dig your stream bed in a series of "steps" or shelves. Each step will become a waterfall. How high these waterfalls should be will be dictated by the size of rocks you will be using for construction. Larger rocks are necessary for higher waterfalls. Don't try stacking rocks to create waterfalls. If one or two rocks isn't high enough to make the waterfall you want, you need bigger rocks, or a smaller waterfall. Let the rocks shape your waterfalls. When your stream and waterfalls have been excavated satisfactorily, lay out your liner as planned. You may wish to use underlayment fabric beneath the liner to protect it from punctures. Underlayment can also be used on top of the liner where larger rocks are placed. Carefully inspect the area where your stream liner transitions to your basin. Overlaps are risky, and prone to leaks. Extra care today may prevent ripping a part a leaking water feature tomorrow. Rock work. This is the most labor intensive part of the build. Creativity is necessary for this phase of construction. Don't get attached to a certain rock or design. If you can't make a rock work like you wanted it, try a different rock. If you can't make anything work, move on and work elsewhere for awhile. Frustration kills creativity, so don't get bogged down by one rock or area. Create your waterfalls first, then build between them. Set larger rocks to frame your waterfalls, then build between them with smaller rocks. Whenever possible, use fewer, larger rocks as opposed to more, smaller rocks. Larger rocks will yield more stability, and have more aesthetic affect. Use waterfall foam to seal between rocks to direct water over the waterfalls, channeling the stream where you want it. This foam is NOT waterproof. Foam will not prevent leaks, or seal liner together. It can be used to direct water, but not stop it. Plumbing and components. At some point during the build, you'll need to install the pump and plumbing for the waterfall. You'll need to bury a pipe from the pump vault in the basin, to the spillway at the top. its best to bury this pipe before all edges and details are completed. The spillway at the top should be installed in combination with the rock work for the top waterfall. Let rocks and spillway work together to shape the last waterfall. Details and edge work. It's best to run your waterfall before finishing all edges and details. Once all rock work is done and foam has dried, turn on the waterfall and examine everything closely. Check for low liner edges. Make sure you have several inches of liner above water level. check all the waterfalls where water changes elevation. It is easy for water to follow a path out over the liner in these transition areas. Once you are satisfied with these critical areas, you can finish all the aesthetic details. Tuck the liner out of sight in the soil on the berms. Add driftwood, gravel, and plants as you wish. If you want to add lights to your water feature, install them once you have seen how the water flows. With the completion of your backyard waterfall, you can relax and enjoy all the beautiful sights and sounds of water. Monitor the water level in the basin. If you need to refill it frequently, There is probably a leak somewhere. check the soil around the waterfalls for damp areas that may indicate leaking. If you are interested in having Tussey Landscaping create a pondless waterfall in your backyard, contact us today to begin the conversation.
11 Comments
![]() Like any new proposition, building a pondless waterfall brings many new questions to mind. It can be difficult to know what questions to ask when trying to decide if a pondless waterfall is the right choice for your backyard. In this article, we will not be devoting any discussion to concrete water features. Concrete features bring with them a host of their own problems, and are avoided for those reasons. How does a water feature work? Understanding how a disappearing waterfall works requires starting at the bottom of the waterfalls. Underground, a basin is constructed that holds the water for the entire feature. This basin is usually hidden with a layer of River gravel. In this basin, a pump vault is built which will house the pump that powers the water feature. Other accessories including an auto fill float, and water treatment options, may also be installed in the pump vault. From the vault water is pumped up to the top of the stream. A spillway at the top disperses the water into the first waterfall and stream. Here, boulders create the stream banks and waterfalls, guiding the water back to the basin, where it is recirculated. Should i leave it run all the time? When properly constructed, a pondless waterfall can run through all four seasons. Over winter months, ice build up will cause water loss, so it is important to monitor water levels if the pondless is left running. If a pondless is not running through the winter months, it is necessary to winterize it. How much does it cost to build a backyard waterfall? The price of a pondless waterfall will reflect its size. Also, different contractors may have different pricing. When comparing prices, It is important to ensure that prices are for comparable water features. Measurements and numbers may be ineffective at communicating what size of waterfall a price reflects. If possible, always ask to see in person some of similar pondless waterfalls constructed by the contractor you are working with. Pondless waterfalls often range in price from $3,000 to $15,000, and larger backyard waterfalls can cost more. To see some pricing and pictures of the water features offered by Tussey Landscaping, click HERE. ![]() Do pumps use a lot of electricity? Today, many of the pumps designed for pondless waterfalls are designed for minimal electricity usage. Many standard sized pondless waterfalls cost only a few dollars a month to run. Low Voltage LED lights that can be incorporated into your waterfalls cost even less to run; they require only very small amounts of electricity to run. Do pondless waterfalls need a filter? Most pondless waterfalls operate without any filter. The gravel on top of the basin filters out any large debris (sticks, leaves, and trash) before it reaches the pump. A pondless waterfall is a low-maintenance way to bring the all the delightful sights and sounds of water to your backyard. These beautiful waterfalls are not expensive to maintain, and can be enjoyed all year long. If you are interested in having Tussey Landscaping create a water masterpiece for you, contact us today. How much does a Koi pond cost? How large can a Koi pond be?
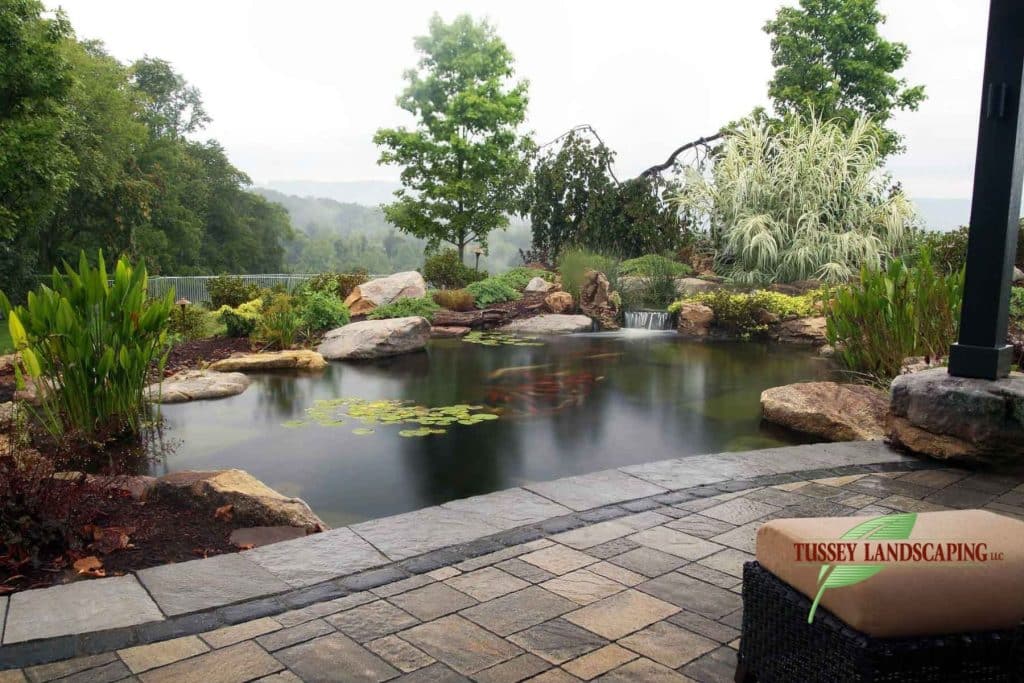
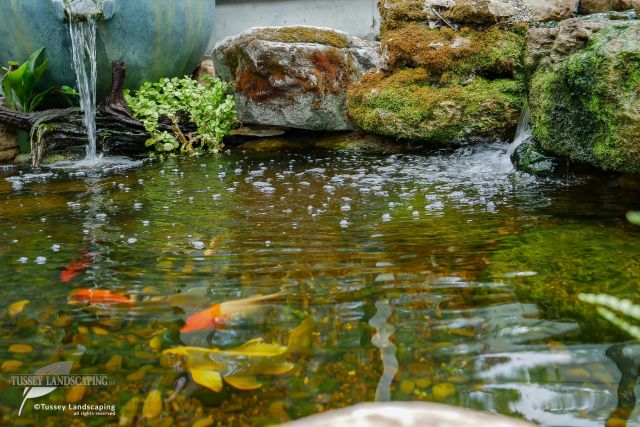
If you are considering having a Koi pond built, these are questions you might be asking. But before we get to pricing and sizes, let’s first take a quick look at some of the requirements for a Koi pond. Koi will thrive in a functioning ecosystem pond. If you are unfamiliar with ecosystem ponds, please read our post on ecosystem ponds first. Now, let’s look at some other keys for a thriving Koi pond. Depth Having a pond of proper depth is important. If a Koi pond is not deep enough, your brightly-colored Koi are within easy reach of any shoreline predators. In climates with winter temperatures, Koi will go dormant during the coldest months. During this time, they will eat very little, remaining inactive on the bottom of the pond. The surface of the pond may freeze over in these months. If the pond is not deep enough, the fish may freeze at the bottom. A Koi pond must be a minimum of two feet deep to allow an ice-free “Warm zone” at the bottom of your pond where the Koi are kept safe from freezing temperatures. For larger Koi, it is recommended to have three feet of water depth. Cover Koi have several natural predators, including Herons, Fishers, and Minks. Other predators may also be present in nearby areas. These predators can be combated by building refuges in your pond. A fish cave that is inaccessible from the top is a great way to provide protection. Using rocks to create safety coves from swimming predators is another way to provide cover for the Koi. Rocks and Gravel Koi are bottom feeders and continuously search the pond floor for food. Building a Koi pond with rock walls and a gravel bottom will give habitat for many strains of algae and microorganisms for Koi to eat. When not under stress, Koi will rummage through the gravel substrate to find nutrition growing in the pond. A healthy ecosystem can produce much of the food the fish population needs to survive. Circulation Without proper circulation, the pond water will become stagnant. Stagnation can lead to murky water, which hides the fish from view. Also, when water stagnates, it will lead to more algal blooms and unwanted insect breeding. If your pond doesn’t properly circulate, gases and minerals in the water can become toxic to fish, causing death in many cases. How Much Does a Koi Pond Cost? Koi ponds vary greatly in size, from a very small pond for several fish, to a pond large enough to support a hundred fish. A large pond can even be designed for swimming, if desired. Let’s look at several common pond sizes and the average cost for each. Various project circumstances can alter price, and there are many additional features that can be added to a pond, so the following are some basic pricing guidelines. Small Koi pond A small Koi pond will be roughly 6 to 8 feet wide and 8 to 12 feet long. Small Koi ponds will only be 2 feet deep. Most small Koi ponds will hold between 500 to 1,000 gallons of water and can support up to 8 medium-sized fish. With added waterfalls or streams, a small Koi pond could cost between $6,000-$9,000. Medium Koi pond A medium pond can range from 10 to 12 feet wide and 14 to 16 feet long. These ponds are often 2 feet deep but can be deeper. Digging a deeper pond will cost more and will greatly increase the volume of your pond and the amount of fish the pond can sustain. A medium Koi pond with an average depth of 2 feet can support a dozen fish. Medium Koi ponds can cost between $15,000 to $25,000. The depth of the pond, along with waterfalls and additional components, contribute to the variability in price. Large Koi pond There isn’t a real limit for how large a Koi pond can be. A large Koi pond can be 15 feet wide by 20 feet long. Large Koi ponds should be constructed 3 feet deep, and usually hold at least 3,000 gallons of water. These habitats can support the largest Koi. Twenty to thirty fish can live in a pond this size. A large Koi pond can cost around $30,000. Wondering what type of Koi pond is right for you? If you’re interested in finding a Koi pond to fit your property and budget, contact us for a consultation. Looking for more inspiration or koi pond ideas? Check out our koi pond photo gallery. Leaks — every pond and waterfall owner's nightmare. But the truth is that a leaking water feature can be fixed. Finding a leak in a rubber liner pond is usually the most challenging part.
Four possible reasons your pond/waterfall is leaking: Your approach to leak detection must be methodical, otherwise you might misdiagnose the cause and possibly waste a lot of time and money. Water loss in a pond or waterfall usually can be attributed to the following four causes:
To locate where and how your water feature is leaking, it is important to have a methodical approach. Rushing to fix a possible cause could be costly and ineffective. Step 1: Measure and record water loss over a consistent time period. The first step in identifying a leak is to record how much water your feature is losing in an easily observable timeframe. To begin, measure water loss while your feature is running. It is important to measure water loss from an accurate and predictable point. Watching the waterline on a rock or observing the apparent rate of a waterfall are not predictable measurements. If your pond has any type of autofill or fill valve that adds water to your pond, turn it off. Do not add any water to the water feature while measuring water loss! The best way to observe water loss is by measuring from a set point. Inside the pump vault, or skimmer is usually the best place to do this. Observing water loss over 6-, 12-, or 24-hour periods is usually most effective. Write down your measurements! Try to be as accurate as possible with your measurements; knowing that your pond lost “about an inch” will not help you or a service technician when trying to find leaks. Once you have a reliable rate of water loss, we can compare your water loss rates to evaporation rates. Evaporation during summer months can claim a large amount of water causing apparent “leaks.” Under normal conditions, a running water feature will lose between ½%-1% of the running water flow per hour in a day. If your pump pushes 3,000 gallons an hour, your water feature can lose between 15-30 gallons per day. A flow meter can be used to calculate how much water is required to refill the pond to its original level. If your pond is losing more water than average daily evaporation rates, it is time to start searching for leaks. Step 2: Search for edge leaks around the stream and pond areas. After ruling out evaporation, edge leaks are the next area to search. Edge leaks will occur most often in stream or waterfall areas. Look for damp or wet soil around the edges of your water feature. If you do find a place where water is running or leeching over the liner, this berm will need to be reworked. There should be enough extra liner buried in the soil to rebuild the edge high enough so that water cannot escape. Areas behind larger rocks or boulders can be prime locations for leaks if the liner gets pushed down behind them. If you can find and fix an edge leak on your water feature, you can begin measuring water loss again. If you don’t observe water loss after fixing the edge leak, congratulations! You have eliminated your leak. If you complete these steps and your water feature is still losing water, it is time to shift attention to the pond (or basin, if you have a disappearing waterfall). Step 3: Test the pond for leaks. Turn off all pumps running the stream or waterfall and allow the pond to sit for a day. Carefully measure and observe the water level when the pumps are off and the water is resting. If the water loss is minimal or zero, this means that your leak is occurring in the stream or the plumbing. If your pond holds water, you are ready for the next step. If the pond is losing water while it is not running, this probably means there is a puncture in the liner. Do not refill your pond. Allow the pond to drain until the water reaches a stable level (meaning the pond has drained to the level of the leak). If your pond drains completely, the puncture must be on the bottom. Take note of the water level before you begin searching the pond. If your pond is rock walled, this may require disassembling the rock walls and cleaning the liner in order to find the puncture. Even a tiny puncture the size of the diameter of a pencil can drain over 100 gallons a day! Once the puncture is located, it will require a rubber liner patch kit. Follow the manufacturer’s requirements for using the patch kit. DO NOT attempt to seal the liner with any type of silicon, foam, or sealer. Most of these products are not fish safe and do not provide a permanent fix. Step 4: Test the stream for leaks. To find a stream liner puncture or hole, the water must continue to flow. To isolate the area of the leak, run a temporary pipeline from your pump to the first waterfall or shelf of your stream. Allow water to run normally through your temporary line for at least 24 hours. During this time, carefully monitor the water level. If you don’t observe any water loss, you can safely conclude that the bottom shelf or waterfall is leak-free. Now, move your temporary pipeline upstream to the next waterfall or shelf. Again, monitor water levels while running the pump through this temporary line. Repeat this process step by step up the stream until you find an area that is losing water. Like a pond liner leak, locating a stream liner leak might require moving rocks and gravel. Use only an appropriate liner patch kit to seal and fix any punctures. Step 5: Test for plumbing leaks. If you have tested all areas of your stream and pond and are still recording significant water loss, your feature probably has a plumbing leak. You might not see any wet areas on the surface since plumbing lines are usually buried at least several inches underground. While the pumps are pushing water through the line, dig along the pipe from the skimmer toward the head of the stream. Once you locate the leak, cut out the compromised section of pipe and replace it. DO NOT attempt to wrap the leaking pipe or fixture in tape, plastic, or any type of sealer. These fixes are meant only for temporary leak control and should only be used in an emergency until a proper repair can be completed. Get Professional Help for Your Water Feature Leak If you are still unable to locate or repair a leak in your water feature, or if you would like a professional to handle your leak dilemma, call us at 814-204-2721 or contact us online. The garden has long been viewed as a getaway. It is a place where we let go of our worries and unwind. It is a place where we trade the stuffy confines of the cubicle for the sweet, fresh fragrance of the outdoors. We need these places. We need a place where we can revel in the beauty of nature all around us; to enjoy the beauty of a single flower or a sunset that paints the entire sky.
"Everybody needs beauty as well as bread, places to stay in and pray in, where nature may heal and cheer and give strength to body and soul alike." - John Muir John Muir was envisioning such a place when he penned these words over one hundred years ago. He worked tirelessly to create the first National Parks, as a place where people could reconnect and be refreshed. He could never have imagined the unending race we sprint every day that we call “normal” life. And somehow at a time when people feel more stressed than ever, the idea of a garden is slipping away, doomed to be a magical place only remembered in dusty novels. It is not gone. When Francis Hodgson Burnett wrote the classic children’s story The Secret Garden a century ago, she captured something of the hopes of all people young and old. A place, a getaway, where all worrisome things were gone, and beauty was the only rule. She wrote of a place where miracles could occur, and where new life and love sprang up, as if out of the ground. She captured the story of a garden. But what makes a garden? What turns a collection of flowers and bushes into a place of healing? To understand the garden, we will have to take a varied approach, looking at The Secret Garden for clues, borrowing ideas from art and science, and examining ourselves to understand nature’s allure. Setting A garden’s setting may be the most overlooked dimension. It can also be the subconscious factor that has the most impression on our memory. A garden’s location in relation to the rest of the environment connects directly to the feelings we have there. Humans attach locations to memories and emotions. When you spend an entire day in a crowded street or a busy market, it can be difficult to remember what happened, and in what order. We need distinct locations to help us mark our memories. Walk into your 5th grade classroom or a home where you once lived – suddenly a flood of memories return that you had not really forgotten. But those seemingly long-forgotten memories were attached to a place. Our memories attach themselves to places. But beyond the plain memory, even our deepest feelings can be there as well. If you have ever gotten sick after eating at a restaurant, you may find it difficult to eat there again. Even if you order different food, even if there are different diners and different cooks, you might still feel uneasy. This is the place where you felt ill. Fortunately, this same connection works the other way as well. When your garden has the correct setting, it too can create the same alcove of memory and feeling. It must be a separate place, a place distinct from anywhere else in your world. Maybe it’s a formal iron gate and well-pruned hedges leading to a manicured pathway. Perhaps some simple stepping stones lead across the lawn to a small cove. But it must be a distinct place. When you step up into a formal dining booth, you feel like you have left the restaurant and are in a different place. The secret garden is not far away. It is not difficult to enter. But when you get there, you are in a different place. Seclusion Privacy is the dream of every harried and frustrated mind. The whirlwind of life endlessly chases us, catches us, and lets us go again. If only we could get away. Most people don’t wish to be entirely alone. Instead, we dream of a place where we can relax without the constant judgment of the world. When Mary Lennox slipped behind the high brick walls of the secret garden, she shielded herself from the critical eyes of her world and entered a place where she could laugh and live. Maybe you don’t want to be surrounded by high brick walls. But we long to have a place of solitude. Our ability to think, to meditate, and to reflect is connected to our closeness to people around us. People who silently watch game after game on the TV will scream themselves hoarse in the stadium. We buy gifts in a frenzy among a crowd of Black Friday shoppers, and then after Christmas is over wonder why. We need privacy to discover our thoughts. Privacy may require more than just a vinyl fence to block the neighbors house. Maybe you need to plant some mature shrubs to hide the garage and its to do list. The gentle sound of running water can cover humming highway traffic or the droning of a neighbor’s lawnmower. And maybe somewhere in the garden there is a bench, or a hammock, or a just a special spot where you can escape. Composition Each garden is unique, just as each painting or sculpture is unique. And it is the uniqueness that makes each one special. Outside of Eden, there is no paragon of gardens. A garden is made to the liking of its owner, so it is foolish to assume all gardens must fit a certain mold or style. Some are formal and decorous, with manicured pathways and well-pruned hedges and roses. Others are rustic to the point of antiquity, with unkempt wildflowers spilling over so they almost cover the winding pathway. Formal garden sculptures or eclectic stonework; all can be a part of a garden. No style is superior, no design less worthy. Rather, each garden in its own way should harness all the capabilities of the senses. The sound of running water, of birds in the trees, is just as necessary to the composition of the garden as the color of the flowers and foliage. The smooth pebble pathway, or the cool flagstone under foot, either one is an important part of the composition that adds flavor and dimension to the garden. Maybe it is a rustic pergola laden with vines, or a tidy pavilion offering shelter from the rain. The composition of a garden reflects its owner’s taste. When completed, all the elements of a garden combine in a symphony of beauty and life. The fragrance of summer flowers, and the smell of fresh dirt beneath our feet reach out to us, tug us into their world. Fish swimming in a tranquil pond communicate grace like the water lilies who share their home. Breezes wafting through the trees, birds singing their songs, and waterfalls bubbling the echo whisper the secret of the garden in our ear. Welcome to your Secret Garden! Talk To Us About Creating a Secret Garden If you’d like to talk with us about creating a dream secret garden of your own, call us at 814-696-3700 or contact us online. Stamped concrete is a poured concrete slab that is imprinted with a design or texture to replicate the look of pavers, natural stone, or another substance. Stamped concrete is often colored or dyed as an added feature.
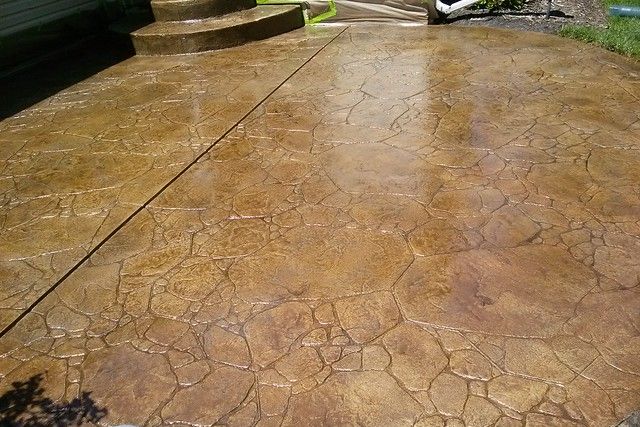
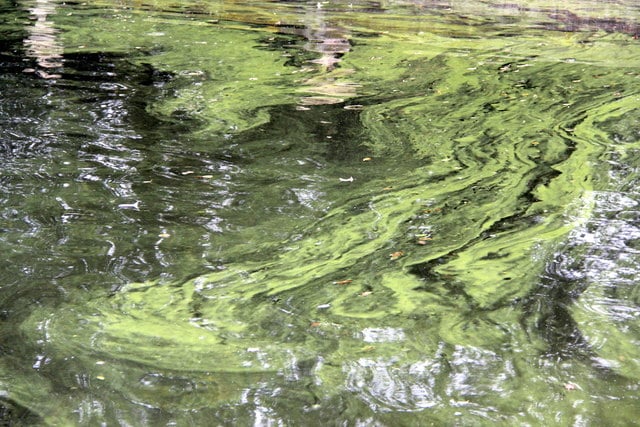
Stamped concrete is a cheaper alternative to pavers, yet holds more aesthetic appeal than regular concrete. However, stamped concrete has a few drawbacks. Here are five issues that we believe you should be consider before choosing stamped concrete for your project. 1. Stamped concrete tends to crack over time. This isn’t unique to stamped concrete – any poured concrete will crack and move over time when exposed to freezing and thawing cycles. 2. Stamped concrete can be slippery, especially when wet. This is usually a result of the surface finish done to the stamped concrete. 3. It can be challenging to get accurate coloring on a colored patio. Some concrete patios are poured with regular concrete, then afterward sprayed with a sealer/color agent that gives the desired color. This spray-on sealer tends to peel off over time. Most spray-colored patios require resealing every few years, which is an added expense. For this reason, most concretes have a dye mixed in to give color through the concrete. At the concrete plant, the batch is mixed with the dye added, then loaded into trucks and hauled to the job site. Unfortunately, this dyeing process is not a specific procedure. Often even after a customer picks out the color they like, when the trucks of already mixed concrete arrive, it may be slightly different than expected. This color variation is commonly considered the responsibility of the customer. Since the pre-mixed concrete on the truck cannot be reused, the only way to change colors may be to pay to return the delivered concrete and purchase a new batch. This can quickly add cost to the project and stress on you. 4. Stamped concrete is difficult to repair or change. After a concrete pad is poured and has cured (dried) in place, it is permanent. You cannot fix surface imperfections, chipped corners or edges, or puddling issues. The only way to remedy these problems is to cut out a patch of concrete and replace it or demolish and redo the entire project. 5. Salt cannot be used to remove ice from stamped concrete. The chemical compound in salt will cause the surface of the concrete to chip and fracture off if exposed to concrete. This makes snow and ice removal difficult, especially with a textured surface that makes shoveling difficult. Contact Us If you're looking to build or re-do your patio or pool area, let us know how we can help. We're happy to answer questions you might have or to provide an estimate. Call us at 814-696-3700 or contact us online. Algae blooms are the culprit for most water quality problems. If your pond water is cloudy, murky, or brown, it’s likely an algae issue.
Algae can grow in almost any body of water with sunlight and nutrients. Here are three common ways to combat algae growth.
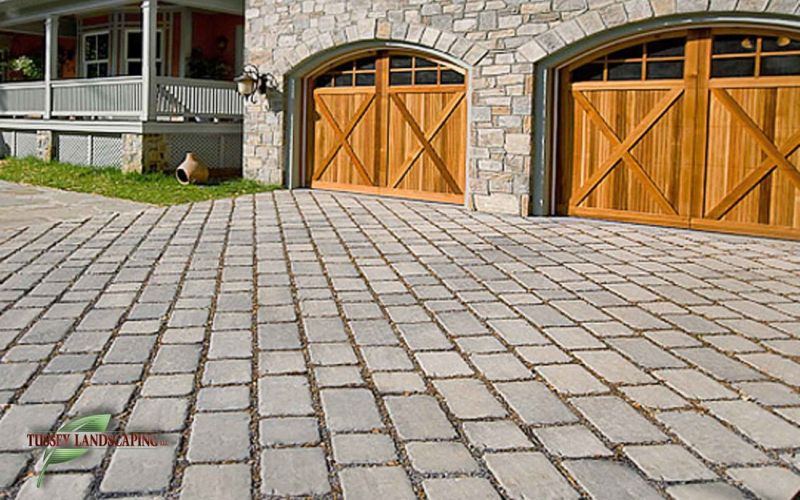
Read more about pond maintenance or contact us to learn how we can help you manage green algae using the safe and natural ecosystem method. We often get questions about this relatively new paving style, so in this article we’ll answer some common questions about permeable pavers and discover a few advantages and best practices along the way. What Are Permeable Pavers? Permeable pavers fall under the broader industry category of permeable paving solutions. Permeable pavement is a surface designed to withstand pedestrian or vehicular use and produces no run-off water from rainstorms. In the industry of permeable paving, permeable pavers are quickly becoming the preferred method. We’ll find some of the reasons why, but first, what are permeable pavers? Permeable pavers are an interlocking concrete paver system designed to allow rain to pass through the surface to the ground beneath without any drains or surface collection systems. This system is designed to work mainly in areas where high surface run-off and storm drain systems are a continued problem. But why permeable pavers? To understand the usefulness of a permeable paving system, we need to evaluate some of the issues created by our modern civilization. Why Use Permeable Pavers? Ancient civilizations have been paving streets in their towns for thousands of years. However, only in the last hundred years have impervious surfaces become commonplace in our lives. Before this, as rain fell, it was quickly absorbed into the ground it fell on, and only under heavy rainfall did run-off become a problem. The first concrete highway in the United States broke ground in 1909. In the decades that followed, almost all the roads in the nation were paved, and parking lots and driveways soon followed. By the beginning of the 21st century, nearly 100% of our cities were covered in impermeable surfaces. From the roofs of our buildings to the parking lots and sidewalks, there was nowhere for the water to go. So, we created elaborate stormwater management systems. While these costly systems deal with most of the drainage issues, they do not address the cause of the problem itself. Permeable paving is a cure for drainage issues. Permeable pavers offer a durable, beautiful way to create a solid surface capable of withstanding vehicle traffic, while still allowing rainwater to pass through it. While all you see on a completed surface is the face of the pavers, and the joints allowing water to escape between them, it is what’s underneath that makes this system work. How Are Permeable Pavers Installed? Like conventional paver systems, permeable pavers are installed on a bed of crushed stone. However, there are significant differences between them. The most noticeable difference is the joint filling between the pavers. Conventional paver joints are filled with sand; usually, polymeric sand is used for durability. This sand does not allow proper infiltration of water through the joints, so it is not suitable for a permeable solution. Instead, fine gravel or stone is used. Industry specifications and paver types may change the exact stone, but usually, a washed #9 stone or a #8 gravel is used to fill the joints. This still functions correctly as a joint filler, giving structural integrity to the interlock system, while allowing water to pass down to the base. All interlocking paver systems are built on a stone base system. This compacted stone layer is usually 6 to 10 inches deep and acts as a foundation for your pavers. Permeable pavers use the same design, with two changes.
This clean stone has void space between it, allowing water to pass through the stone layer to the earth below. If the area is prone to heavy rainfall or is in soil conditions that don’t allow natural percolation of rainwater, a water collection system can be built beneath the paver base layer. This hidden collection system can carry excess water to an underground reservoir or another waterway. Permeable pavers offer a beautiful way to end unwanted runoff water problems and provide a functional, puddle-free space. From industrial parking lots to backyard patios and walkways, this paving innovation is changing the way we deal with water. Contact us if you’d like to discuss how permeable pavers might improve your landscape. What is an ecosystem pond? How does ecosystem pond work? What makes an ecosystem pond different from a pool? Is one pond better than another? Here we’ll explore the terms and definitions of this style of pond, and how it works. But before we do that, let’s take a step back, to a place away from the hustle and noise of cities, a place far from the dirt and smog of factories and industries. To a beautiful lake. What do you see? It’s beautiful! The entire atmosphere seems relaxed and peaceful. But if you wait silently, you’ll see, hear, and feel more than you imagined. Cattails rustle in the breeze; lily pads float serenely. Then a bird chirps. A fish splashes. A frog lets out a melancholy croak as he dives into the water. Suddenly you realize that all around you, everything is alive! Minnows race in the shallow waters. Dragonflies skim the surface of the water. A family of ducks swims and dives through the water. Water strider bugs row madly across the still water, swallows dip and fly overhead, and in the gentle breeze that moves across the water, you hear the distant cry of a hawk. The tall trees’ long roots grow down into the water, in search of the life it gives; even the gentle flowers along the water nod in celebration of life. This is life, unmarred by everything man has done to make our world better, faster, easier. This is a natural ecosystem. An ecosystem pond is a pond or stream designed to function following the patterns of nature – no harmful chemicals, complex filter system, or chlorine. These natural beauties are created to embrace and enhance life on every level, from the graceful plants that add color around and in the water to the beautiful fish that swim in the shallows and the birds that bathe at the water’s edge. Welcome to pond life. These ponds all follow similar construction theory, but they can be designed to fit almost any backyard size or area. Even a small space, indoor or outdoor, can be transformed with the beauty and life of an ecosystem pond. But how is this done? A freshwater ecosystem has almost endless players that contribute to the symphony, but we’ll look at a few of the key players that are almost universal, from the smallest patio bowl pond to the endless Everglades. Circulation Circulation is vital to pond life. In a naturally-occurring system, circulation usually happens by the natural flow of rivers or creeks. In a man-made system, we recreate this with a simple skimmer and waterfall system. This circulation does several things. First, the moving surface water effectively skims floating debris from the surface of the pond, removing excess leaves and litter before they sink to the bottom. Circulation also helps keep the oxygen in the water at healthy levels for the plants and fish. With proper circulation, no brackish water will ever become a breeding ground for those pesky mosquitoes. Filtration Pond filtration can be divided into two categories: Mechanical Filtration and Biological Filtration. Mechanical filtration can be thought of as the physical removal of debris from water. The skimming of the circulation system plays an integral part in mechanical filtration. In a constructed ecosystem, we enhance this system by using a skimmer basket to remove leaves and debris, and filter mats to aid in separating tiny pieces of debris from the flow of water. The same skimmer that holds these functions also conveniently houses the pump that provides circulation for the pond. Biological filtration is the removal of excess nutrients from the water. These nutrients are invisible and seem so trivial, but a nutrient imbalance is the beginning of many problems, from cloudy water to prolific algae blooms and poor fish health. Healthy bacteria play a major role in biological filtration; these bacteria break down and devour sediments and debris and improve water clarity. The natural filtration acts as the digestive system of a pond, and biologists intentionally select these healthy bacteria strains because they are safe for humans and animals. Fun Fact: The human body has over one hundred billion healthy bacteria in it! (that’s 100,000,000,000) A pond without healthy bacteria can get a belly ache, just like its owners. Plants Many people assume plants are simply a cosmetic to enhance pond life; however, they are vital to a flourishing ecosystem. Aquatic plants pull nutrients out of the water to grow. If these nutrients remain in the water, they will allow algae to flourish. So, having established plants in and around the pond will starve unwanted algae out of the ecosystem. Plants also put oxygen into the water in exchange for the nitrates and carbon dioxide they pull out. This dramatically boosts fish health; they need oxygen in the water to live. Plants also provide cover for small pond life to flourish in, from the dragonflies who control bug populations to the microbes who silently consume debris and waste from the pond. Fun Fact: While mosquitoes cannot reproduce in the moving water of a correctly designed ecosystem pond, Dragonflies prefer this environment for breeding. These tiny carnivores can eat up to a hundred mosquitoes in a single day! Fish
These silent friends do much more than exist and look beautiful. Just as the plants pull carbon dioxide out of the water and release oxygen back in for the fish, the fish give back to their beneficiaries. They consume oxygen in the water but also release carbon dioxide back for the plants. Fish waste acts as a fertilizer to the many plants that thrive in these mutual waters. Many fish act as ever-on-duty cleaners, eating algae growth off rocks and gravel in the pond. Fun Fact: Koi Fish, long considered the king of the water garden fish world, are bottom feeders. This means they are best suited to eat from the bottom of your pond; cleaning algae from gravel is as natural to them as eating a sandwich is to us. Rocks and Gravel Rocks are essential to the construction of an ecosystem pond. Rocks provide structural stability and add coves of shelter for fish from natural predators from above. What little algae grows on the surface of rocks and gravel becomes a food source for the fish. Rocks and gravel also significantly increase the surface area of growing space for the bacteria that digest pond waste; these microscopic workers need to attach to a surface to live. There are many more finessed parts of a properly functioning ecosystem pond, but these parts together make up the body of what a freshwater ecosystem is and how it works. Coming together, they can create all the life, peace, and beauty of the world’s most delicate and beautiful ecosystems. Welcome to pond life – you belong here! It’s a question that’s been raised time and again by professionals, do-it-yourself enthusiasts, and homeowners looking to make a wise investment decision.
Concrete When we speak of concrete, we’re generally talking about a single (monolithic, to be technical), poured concrete slab. This concrete is usually reinforced with wire or rebar and can be smooth finished or textured. Stamped concrete often falls into this category, although there are some other differences between stamped and regular concrete. Concrete is usually poured either directly on the prepared site ground, or ideally, on a bedding layer of at least 2 inches of clean stone. Most public sidewalks and curbs, garage floors, and residential concrete projects are done this way. Patio Pavers Most paving stones—or pavers, as we call them—are made from a pre-cured concrete. There are also clay bricks and natural stone products, but for simplicity, we’ll focus on concrete paving stones. Pavers don’t have wire or rebar grid in them. Instead, their strength comes from the interlocking pavers around them, and the weight distribution that it provides. Pavers require more extensive base work. Our recommendation is to have at least a 6-inch crushed stone base and a 1-inch layer of bedding sand. All correctly installed residential paver walkways and patios require this minimum, while driveways and industrial jobs require much more. A Head-to-Head Comparison In four-season climates like ours in Pennsylvania, both materials are subject to moving ground caused by the freeze and thaw of the soil below them, and they behave in different ways. Since concrete is a single “free-floating” slab, either the entire piece of concrete will move up or down, or it will crack. This movement is what causes the uneven bumps to appear along the joints in a sidewalk and cracks to appear in the previously smooth patio. Contractors avoid this problem by putting “safety cracks” in the concrete. However, over time, concrete will still tend to crack and heave, which cannot be repaired. You can think of pavers as many small concrete slabs locked together. Freeze and thaw cycles will move pavers too. However, each joint between two pavers allows for a bit of flex and movement. In this way, pavers can move with the freeze, and will settle back into place without leaving any bumps or cracks. In both cases, this movement is usually minimal; unfortunately, if the concrete flexes more than 0.125 inches, it will crack. Pricing of Concrete vs. Stamped Pavers Initially, a poured concrete slab will be cheaper to install than a paver area of the same size. Poured concrete requires less base work and preparation and is less labor intensive than pavers. There are some risks to be considered with this installation. Once the concrete slab is poured, it is permanent. If a crack develops, or a corner is chipped, it is usually costly to fix. Repairs often require cutting a patch out or demolishing the entire pad and re-pouring it. The contractor might repair any issues related to the original construction. But any cracks, chips, or problems that occur after installation will incur additional cost for the homeowner. Pavers cost more to install but are less costly to repair or alter. If a single paver is chipped or marred, it can be removed and replaced with little difficulty. When properly installed, no cracks or gaps should appear. Most pavers come with a warranty on the quality of the pavers. Many contractors offer a warranty on their work for two to five years or longer. Concrete offers a range of color variations created by dyeing the wet (not yet poured) concrete a particular color, which is done on the day of the installation. Concrete can be stamped with a pattern or finished with several different texture options. Pavers offer an almost endless avenue of artistic opportunity. Many pavers have several color options, and various pavers can be used together to create contrast or complementing borders and color schemes. You can choose from varying textures to create a certain feel – from a smooth, modern design or an aged, textured feel. Patterns can be made with pavers as well. For ideas on color, texture, pattern, visit our Hardscape Project Gallery . Pavers can also be used to correspond with color-matching retaining walls, steps, fireplaces and more. If your location isn’t flat and grading work must be done, consider the possibilities of combining Pavers and walls to complement each other. Final Thoughts
Here are a few questions to consider as you plan your hardscaping project:
Ultimately, the choice is yours. You may be the new owners of a home that has a pond in the backyard. Maybe the pond you built 10 years ago needs a facelift. Perhaps that concrete fountain you had built has leaked since day one, and you are ready to get it fixed. Whatever the case may be, here are a few things you should know going into a pond repair or revamp project. Concrete Features If you have a concrete fountain, waterfall or pond, any repairs or maintenance will be handled differently than a rubber liner pond. Concrete is a very permanent fixture. However, over time, all concrete is destined to crack and break. This is problematic if your pond or fountain develops a crack. Unfortunately, once a concrete fixture develops a leak, it is complicated to fix. Various sealers or joint fillers can be used, although they have mixed results. If your concrete water feature needs repairs, prepare to have it removed entirely and rebuilt. Rubber Liner Features A liner pond is the most durable, but it can need maintenance or repair over time. However, there is a wide range of fixes available or necessary. Several common types of repairs and facelifts can be done. Liner Patching Leak Repair If your pond is leaking, this can be a complicated repair. Locating a puncture is difficult, especially in an older pond. If your pond has rock walls and gravel in it, this will require disassembling the walls to find and fix the leak. Locating a leak usually takes several weeks of observation. If the hole can be found and patched, it can still be difficult to guarantee that the problem is eliminated. UV rays from the sun will deteriorate a liner over time. Once a deteriorating liner begins to leak, it will continue to develop holes. At that point, it is best to replace the liner, which will require a rebuild. Pond Pump & Component Repairs Most pump repairs can be done on site by a professional. If your pump no longer works, a technician could repair it, or it might need to be replaced. This is usually not a complicated repair if your pond is designed properly. Plumbing lines may crack due to freezing temperatures or get severed by broken by roots or moving ground. Plumbing repairs are simple to diagnose and can be fixed easily. Your pond may have a skimmer or pump vault and a biofalls or spillway. While it is unlikely that these components will need to be replaced, occasionally replacement is necessary for older ponds. These repairs can be complicated and require a professional. Pond Facelift/ Revamp Maybe you like your pond, but you would like to add rock walls and gravel or rebuild the rock walls and waterfalls that are there. It is important to identify the risks associated and we do not recommend it. Any rebuilding work done within a pond risks puncturing the liner. If you chose to remove all rocks and rebuild, it is recommended to replace the liner as well which essentially means a complete rebuild. Rocks can be reused depending on what they are, or new rocks can be brought in. If you hire a contractor to rebuild your pond, make sure you discuss the possibility of leaks. It is important to have a clear understanding of liability for leaks and additional repairs before beginning a pond revamp. Pond revamps can be very labor intensive and may uncover unforeseen problems and cost. If your pond requires extensive repairs and rebuilding, it may be in your best interest to remove the entire pond and install a new one. Contact Us About Pond Repair
If you are unsure what repairs are necessary on your pond, or you would like to have a professional evaluate your pond for estimated repair needs and costs, please contact us or call 814-204-3196. “How much will this cost?” This is perhaps the most asked question of any sales transaction, and rightly so. Landscaping is no different, from Petunias to Pine trees, the small landscape to the full property renovation. What will this project cost? While every project is unique, there are some essential factors to consider. So, let’s look at some of the contributors to a project cost. Size This is the most obvious factor and needs no explaining. Larger projects generally cost more, although this is not the most significant thing to consider. Plants The plants your contractor uses will make a significant difference in the look of your final product. While you can purchase many plants from big box stores (Home Depot, Lowe’s) at lower prices, there is more to consider. Plants grown by Certified Grower will be raised to be disease and insect resistant. This can play a significant role in the health of your plants after they are planted on your property. The higher plant survival rates offset the extra cost to buy plants from reputable growers. A cheap plant isn’t worth much if it dies after only a few months. Another variable in plant pricing is maturity. For example, a Mature Weeping White Pine like the one in the center of this picture will cost several hundred dollars. A small tree like this will only cost twenty to thirty dollars but will take over a decade to grow to a similar size. In areas where you want to give Immediate aesthetic appeal, it is always beneficial to pay more for mature plants that provide proper aspect ratio and maturity to your property. Different varieties of plants are more challenging to grow or grow more slowly, and this is reflected in their price. Rarer or slower-growing varieties can cost significantly more than some fast-growing, common types. Area Where is your property located in relation to your contractor? Even more importantly, what is the terrain like where your landscape will be installed? Difficult access, narrow spaces, overhead lines, and other obstacles will complicate the project and drive up the cost. What is the soil like in the area you want to be landscaped? If the soil is poor or rocky, better soil will need to be hauled in. Your landscape may involve repairing lawn or replanting grass at completion. Machinery Extra machinery may be useful or necessary, depending on the conditions of your project. If existing trees or plants need to be removed, this will require extra work or even the skills of a professional arborist. Reshaping flowerbeds and regrading lawns are jobs that require additional machinery. Some large trees and shrubs need heavy machinery to handle and place. A tree like the one shown in this picture requires two equipment operators and a third helper working together to plant it correctly. Any additional machinery needs should be identified at the beginning of the project. Design On some smaller projects, a design plan is not necessary, but as a project’s scope grows and becomes more complex, a design becomes crucial. A design doesn’t necessarily mean a scale drawing of your backyard. More importantly, the design is what your project will look like at completion.
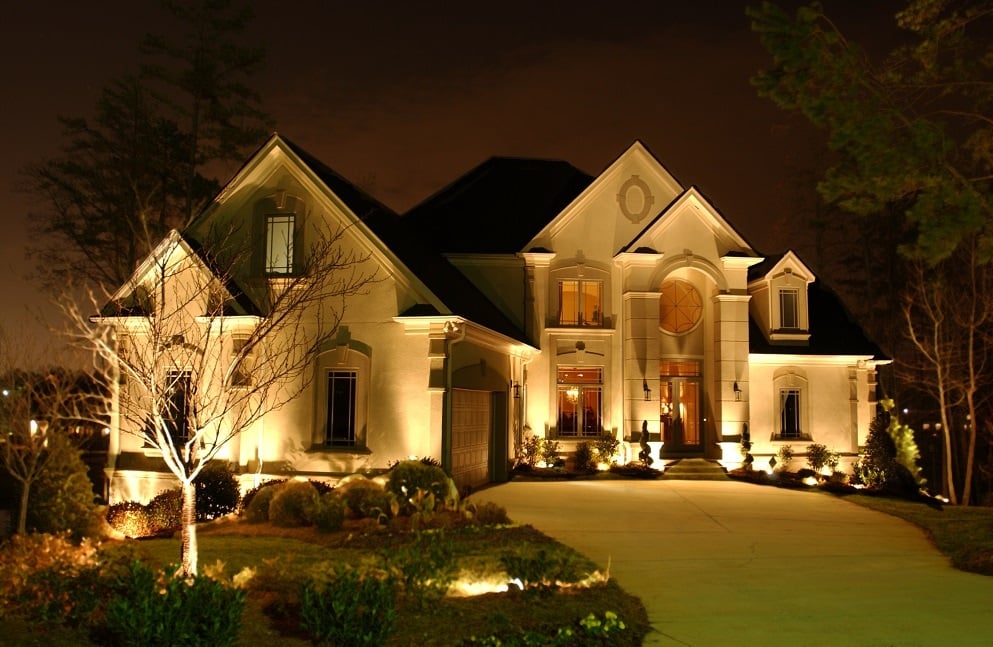
A well-designed landscape should give you proper sizing and spacing of plants. Color harmony and four-season beauty should be considered in the design. Expertise Many contractors have been in the industry for decades. When you hire one of them, you are paying to have their expertise and years of experience working on your property. Your landscaper will know which plants will grow best in your area, and what varieties will best complement your home. This knowledge is not free, but expertise is invaluable in creating a beautiful landscape! Match the size and vision of your project to a professional who has the experience and ability to meet your expectations. Now that you understand some of the contributors to a landscape’s price, let’s look at some examples of what’s possible and what it costs. Small Project Feature A small Landscape project is usually one that can be completed in one or two days, with minimal machinery needs. If a small project doesn’t have many complications, it can be a very effective way to add beauty to your home or give you a little slice of paradise you’ve been seeking. A small landscape project will usually cost between $2,000 to $5,000. The logistics of a crew traveling to your property with the necessary tools and materials will be a large part of this price. Medium Project Feature A medium project feature will take several days to complete. This could be a Landscape renovation to the street side of your house, or a secluded area of your backyard. Medium sized landscapes are often paired with a sidewalk or patio; if this is also installed, it will add another dimension to the project. For simplicity we are focusing only on landscaping. If you’re considering adding a walkway or patio, visit our explanation of concrete versus pavers. A medium project will usually involve some machinery. Extra materials (soil, boulders, etc.) may also be used. Consider adding lighting to your project to amplify the night beauty of your project. Medium-sized landscapes will usually cost $10,000-$20,000. These projects can involve large amounts of labor to complete. Having a design in place will help the project go smoothly. Large Landscape Project Consider these projects the full property makeover. If you’re ready to transform your property into an outdoor destination, then it may be time for a landscape transformation. These projects will take a minimum of five working days to complete and will require extensive machinery use. Most Large projects will involve reshaping the terrain and changing lawn and planting areas. Extra materials will be hauled in to create a masterpiece. Lighting should be added to best highlight your new realm at night. These projects cost between $25,000- $50,000. Design and composition are critical for large projects. Make sure the professionals creating your landscape have suitable experience and expertise to make your vision a reality. Now that you understand some of the components of a beautiful landscape, its time to look at your backyard. Do you have a dream for your property? If you’re still evaluating your property, here are a few ideas for you. Consider a water feature. Ecosystems ponds are popular, and are worth considering. If you want other ideas on ways water can be incorporated into your landscape, check out our water feature photo gallery. A tasteful lighting package will highlight new dimensions of your outdoor space. Consider extending your landscape into the night with a low-maintenance lighting system. Landscaping isn’t only for your enjoyment. A tasteful landscape can beautify your property for all who pass by. Use nature’s beauty to create a welcoming feel to all who visit your home.
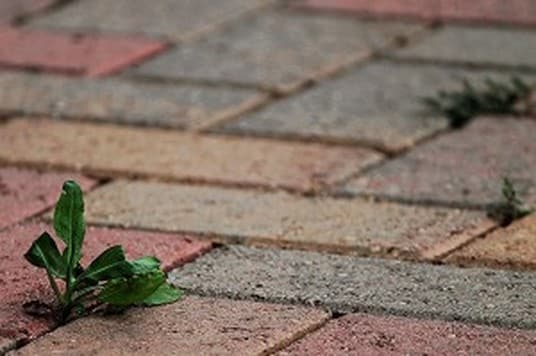
Landscaping can offer function as well as beauty. Adding a walkway, patio, or steps will make your property more useable. When done correctly, landscape and hardscape can work together to add beauty and value to your home. For more information or to see more ideas, visit our Project Showcase articles. ![]() Why do weeds persistently grow in the joints of my pavers? This is a common question we hear and a problem that you might be encountering now that it’s early spring in Central Pennsylvania. Misconceptions About Patio Weeds Weeds do not grow from underground up through the pavers. Adding layers of weed barrier under the patio pavers or laying down additional stone will not eliminate your weed problem. Weeds are prolific growers, but there are a few steps you can take to keep them down. How Weeds Grow Between Paver Joints Almost all weeds you see growing in sidewalk or patio joints are weed seeds that have sprouted on top of the patio. Over time, dirt accumulates between the joints and acts as a planting zone where airborne seeds settle and sprout. What To Do Prevent dirt accumulation on top of your patio to keep weed growth down. It might be a good idea to clean paver and walkway joints with a pressure washer and sweep in new sand every three to five years. Sealing your pavers with a suitable paver sealer will harden the sand in the joints and make it more difficult for weed seeds to sprout. A sealer will also rejuvenate your pavers’ color and enhance the overall look. If weeds occasionally pop up, a spray weed killer can be used. Using an herbicide like RoundUp will not harm the pavers, and offers a quick solution to unsightly weeds on your patio or driveway. Gloria Nilson Real Estate Company gave us their take on whether or not it is a good idea to use landscaping as a way to raise the value of your home for the Pa area, including State College, Altoona, Hollidaysburg, Johnstown, Bedford, and Huntingdon Pa. Read the article below: INCREASING YOUR HOME'S VALUE WITH A PROFESSIONAL LANDSCAPER![]() If you’re looking to sell your home in the near future, you want to get as much money as you possibly can for it. After all, your home is most likely your biggest investment. So what can you do increase the value of your home? New Jersey realtors recommend using a professional landscaper. When prospective buyers look at your home, the first thing they see is the front yard. They want a home that has curb appeal—a home that looks inviting. If they see a lawn overgrown with weeds or a bare dirt area that looks unattractive, they may quickly move on to the next house. In fact, surveys show that home buyers are looking for homes with sophisticated designs. Survey participants were shown photos of a new home with landscaping consisting of various designs and plants. They preferred homes with more intricate designs, large evergreen plants, annual color plants and colored landscape. The increase in value from a home with no landscape to a home that is well-landscaped depends on the location. In Louisiana, the average increase is 5.5 percent, while the increase is more than double that amount in South Carolina (11.4 percent). This means that a home worth $200,000 can increase by $11,000 with new landscaping. In South Carolina, the same home would increase its value by $22,800. What Should You Do? Some real estate professionals recommend investing 10 percent of the value of your home in landscaping. So for the same $200,000 home in the example above, you should invest $20,000. But many homeowners don’t have that much money to spend. So what are the options in this case? At the very minimum, you should focus on adding color to your yard. Focus on a good mix of flowering shrubs, annuals and perennials. Remove all the weeds and work on mulching and edging. Do what you can to get your lawn as full and green as possible. Doing this is fairly inexpensive. In fact, if you don’t have the time to do it yourself, you can hire someone to do it for you for just a few hundred dollars. Focus on the actual home as well. Touch up the paint. Put a fresh coat of paint on the front door. Add new house numbers. These simple fixes will boost the attractiveness of your home. How Tussey Landscaping Can Help Do you have ideas for what you want to do the exterior of your home? If you have a design in mind, Tussey Landscaping can help you achieve it. We have more than 20 years of experience designing beautiful outdoor spaces for homes in Hollidaysburg, State College and the surrounding areas. Our award-winning company specializes in many aspects of landscaping, including design, swimming pools, gardens, outdoor audio and lighting, pergolas, pavilions and hardscapes. We handle ponds, patios, garden fountains, waterfalls, retaining walls, landscaping services and much more. Our dedicated staff will provide you with top-quality customer service and help you design the front yard and backyard of your dreams. Contact us today to get started on a gorgeous outdoor space that will have your neighbors talking. ![]() So you have been saving pictures you find online or in a catalog for months, or maybe even years, and now you are browsing the internet trying to decide who to hire. How on earth are you supposed to make a decision? You may have talked to several contractors, why was the one contractor's estimate so high priced? And the other is so low you wonder how they could possibly do it for that budget? What about finding a contractor in the middle somewhere? Stick around and read on. We'll offer some pointers on things you can do to double check and make sure you are hiring a respectable trustworthy contractor. Actionable Steps You Should Take With Any Company You Consider Hiring:
The above pointers are our best effort to give you all the things that you should consider in the process of hiring a landscape company. Our goal is to do our best to provide you with the information you need to know and consider, and the possible consequences of those choices, and then stand back and give you the freedom to make your decision. No pressure. So many people find this process overwhelming, others just call their buddy's friend who does landscaping and have them come over and do the project, and still others simply hire the lowest bid. We've run into situations where the homeowner got 3 different bids on a project, one of them being ours. The lowest bid was literally 10 times less than ours. That homeowner later confided in us that as he considered these different bids, he decided there is no way possible that the lowest bid could accomplish his goal. (It would not even have covered 1/4 of the material costs, let alone the labor and equipment costs.) This particular homeowner had had some experience in hiring contractors, he'd done it before, and understood what happens when something is "too good to be true" For instance, just a few blocks away, another homeowner had hired a company to do a large backyard project. That second homeowner spent 6 digits on a large outdoor living space project with this first company. But... 2 years later problems began surfacing. They brought in an expert from the product manufacturer, and discovered the entire project was failing due to improper construction. This homowner ended up spending 3 times what he originally had with the lower priced company to remove all the incorrectly installed product, and re-install his dream outdoor living space. Today, over ten years later, that outdoor living space is still functioning as intended and is more beautiful than ever. I just went off on that storytelling venture, simply to try to offer information and perspective as what can happen in the real world. The information is yours to digest and choose a way forward for your project. We understand, we are not a good fit for every customer, and every project. And that's ok. But regardless, we still want you to succeed with your vision for your backyard, and want to protect all of you from expensive regrets. Good luck with your project, and as always, we are always available to discuss and answer any questions you may have. You can easily message us on our Facebook page as well if you'd rather. Cheers! Weston Zimmerman Weston has been working at Tussey since 2007, starting as a laborer on the crews. Today he works as a foreman on one of the crews during the landscaping season, as well as our marketing director at Tussey. He enjoys building natural water features and filming and producing video content. Check out Tussey's Youtube channel to see some of his work.
Searching for a landscaper for your project at your Altoona, State College or Bedford home? Tussey Landscaping is a design/build firm equipped to do so with award winning designs and the artistic touch inspired by people who love what they do. All of our work is backed by Tussey Landscaping's guarantee. We are a full service company with our roots in landscaping offering you a complete list of services for your one of a kind Outdoor Living Space. Are you looking for a landscaper in the State College, Altoona, Bedford, or Johnstown PA area? All of us here at Tussey landscaping love what we do and we guarantee that you will be happy with the products and services we provide.
Having an outdoor space that looks and feels comfortable is very important. This investment shows to your family and friends that you enjoy spending time outdoors with them. It also adds style and beauty to your home and increases the value of your property. If you live in the Altoona, State College or Bedford PA area allow us to show you how we can improve the look and functionality of any space. INNOVATIVE APPROACH Our experienced team has specialized training and expertise needed to complete all kinds of landscaping projects. From the basic project to the most complex, we strive to find the most innovative and efficient way to bring our clients only the best. Call us to find out more about any of our following services: • Residential landscaping • Custom designs • Landscape lighting • Retaining walls and patios • Mulching and bed cleanups • Advice and excellent service • Landscape Beds & Gardens
Our landscaping company in services Altoona, State College or Bedford PA and surrounding areas. We will give new life to your landscaping. We have a variety of techniques and tools that will expedite and beautify any job
OUR TRAINED AND RELIABLE TEAM The crews here at Tussey Landscaping know what it takes to get your landscaping and gardens looking great. We are approaching 30 years of experience, and we pride ourselves on impeccable attention to detail. We realize how important these details are. We don't cut corners ensuring that every job is done right the first time. Count on Tussey Landscaping to start and finish on time, complete the job properly, and leave your Altoona, State College or Bedford PA residence looking great. We realize that your time and your property is very valuable and we guarantee we will also treat it that way. You can depend on Tussey Landscaping's professional team to bring to your property the beauty, care, respect, and professionalism it deserves!
Enter your email in the field below to receive our e-Book on 5 Points To Cover When Hiring A Landscape Contractor.
![]()
It is challenging to wade through the many details of doing or redoing the landscaping on your Altoona, State College, or Bedford property. Where do you start when choosing a landscape contractor? How do you choose the right landscaper for your project? How do you know who to trust to bring you the quality and expertise you want? Below are few points to think through as you make your decision. Hopefully these can help and turn your dreams and inspirations into a reality for your property.
Finding the best solution to all these questions starts with choosing the right Altoona, State College, or Bedford landscaper.
Enter your email in the field below to receive our e-Book on 5 Points To Cover When Hiring A Landscape Contractor.
|
WESTON ZIMMERMANWeston has been working at Tussey since 2007, starting as a laborer on the crews. Today he works as a foreman on one of the crews during the landscaping season, as well as our marketing director at Tussey. Archives
March 2020
Categories
All
|